
Additional Parts, Tools, and Supplies Needed for Installation:
- Check Valve for Primary Pump (homeowners often have this already)
- PVC Primer/Cleaner and Cement
- Hand Saw and/or PVC cutting tool
- Phillips and Slotted Screwdrivers
- Utility Knife
- Tape measure
- Large adjustable pliers
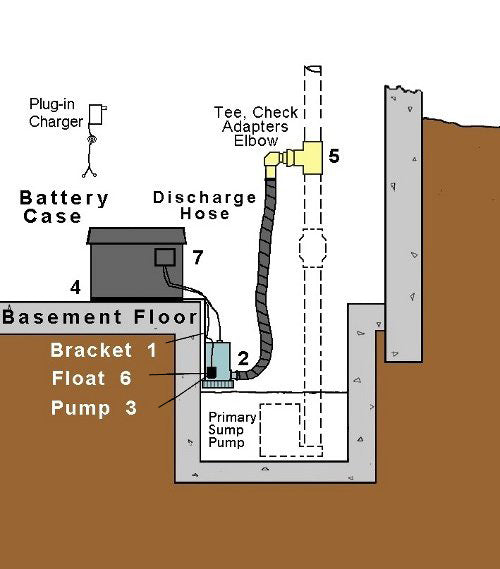
Both the DH900 and DH1800 are installed in the same way using the same brackets. Before installation, check to make sure that the check valve on your main pump discharge pipe is in good working order. Replace it if necessary. Also note that the connection point on the main pump discharge pipe is much higher for the DH900 (Step 5) than for the DH1800. We accommodate this by including the necessary extra hose length.
Installation Steps:
- Put 2 parts of stainless steel bracket together.
- Connect hose to pump with hose clamp.
- Lower pump/bracket assembly into sump pit against side wall.
- Place battery case with battery onto bracket, resting flat on the floor to stabilize pump.
- Unplug main pump, drain water out, and connect Tee fitting to main pump discharge pipe and clamp hose to barbed fitting.
- Attach float to EITHER pump bracket OR discharge pipe using one of the 2 clamps provided, and adjust cord for proper swing of float.
- Connect the battery and test the unit. You're done! See the instructions included with the pump for more detail.